As the story “Hate in the Hallways” explains, hate symbols are powerful—sometimes even more powerful than hateful language. Yet just as symbols can be a powerful tool of hate and oppression, they can also be a way to represent love, appreciation of differences and struggles for justice. This toolkit introduces students to ways in which visual arts and design have been used to symbolize justice and tolerance. Students will have a chance to create their own symbols to express their appreciation of diversity and their ideas about justice.
Essential Questions
- How have symbols been used to represent hate and oppression?
- How have symbols been used to represent compassion and justice?
- What makes a symbol appealing and effective?
Procedure
1. As you let students know that the lesson will include a brief discussion of hate symbols, gauge the level of safety in the classroom. If you think that showing hateful symbols will unsettle certain students or cause them to feel targeted, keep the introduction brief and strictly verbal.
2. Explain that visual images can be even more powerful than words in expressing hate or in showing how one group wants to have power over another. Ask students if they have ever seen any hate symbols displayed in public or in the school. How did these symbols make them feel? How would the symbol make them feel if it were targeting a group they were part of? (Note: If your school has recently experienced an incident of hate or bias, make sure this activity integrates with the larger school response planning; adjust or forgo as necessary to make sure that students are not overwhelmed.)
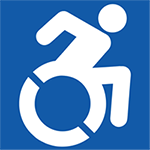
3. Explain that in addition to expressing hate, symbols can also be powerful tools for expressing love, respect and appreciation of difference. Ask students to share any positive symbols they have seen. They might have seen such symbols on bumper stickers, posters, graffiti or online via social media. After students have shared their examples, share a few examples with them, and explain the origin, history and purpose of the symbols.


4. Break students into small groups and have them discuss the following questions:
- How does each of these symbols make you feel? If you see a symbol like this in a store or on a building, what message does it communicate to you?
- What do you think makes this symbol powerful? Is it as powerful as words? Think together about why or why not.
- Now that you have seen these examples, what other symbols of love, respect and justice or fairness can you think of? Where have you seen these symbols, and what message do they communicate to you?
5. Bring students back together as one group. Explain that they will be developing their own symbols of compassion and justice. They may work individually (or with partners). Instruct them to brainstorm and decide what cause, group or belief they will represent. Then give them time, and colored pencils and paper, and allow them to design and draft their symbols. Circulate to help students talk about what they hope their symbols will communicate. Remind them that they can use a few words if they want to, but sometimes the simplest symbols are the most effective.
6. Once each student or team has drafted a symbol, have them workshop their symbols with partners. Partners should give positive feedback and constructive criticism. The purpose of this step is to help students understand that their symbols are every bit as powerful as their writing and need to be taken just as seriously.
7. Allow students to revise their symbols and publish final versions of them using permanent marker or by designing the symbol on a computer.
8. Instruct each student or team to write one or two sentences describing the inspiration for their symbols. Then hang the published symbols around your classroom as flags and invite other students to view them.
9. As a reflection, allow students to consider places they think their particular symbols might be especially necessary or meaningful. If it is appropriate, help them figure out ways to approach relevant community members about posting versions of these symbols.

0 COMMENTS